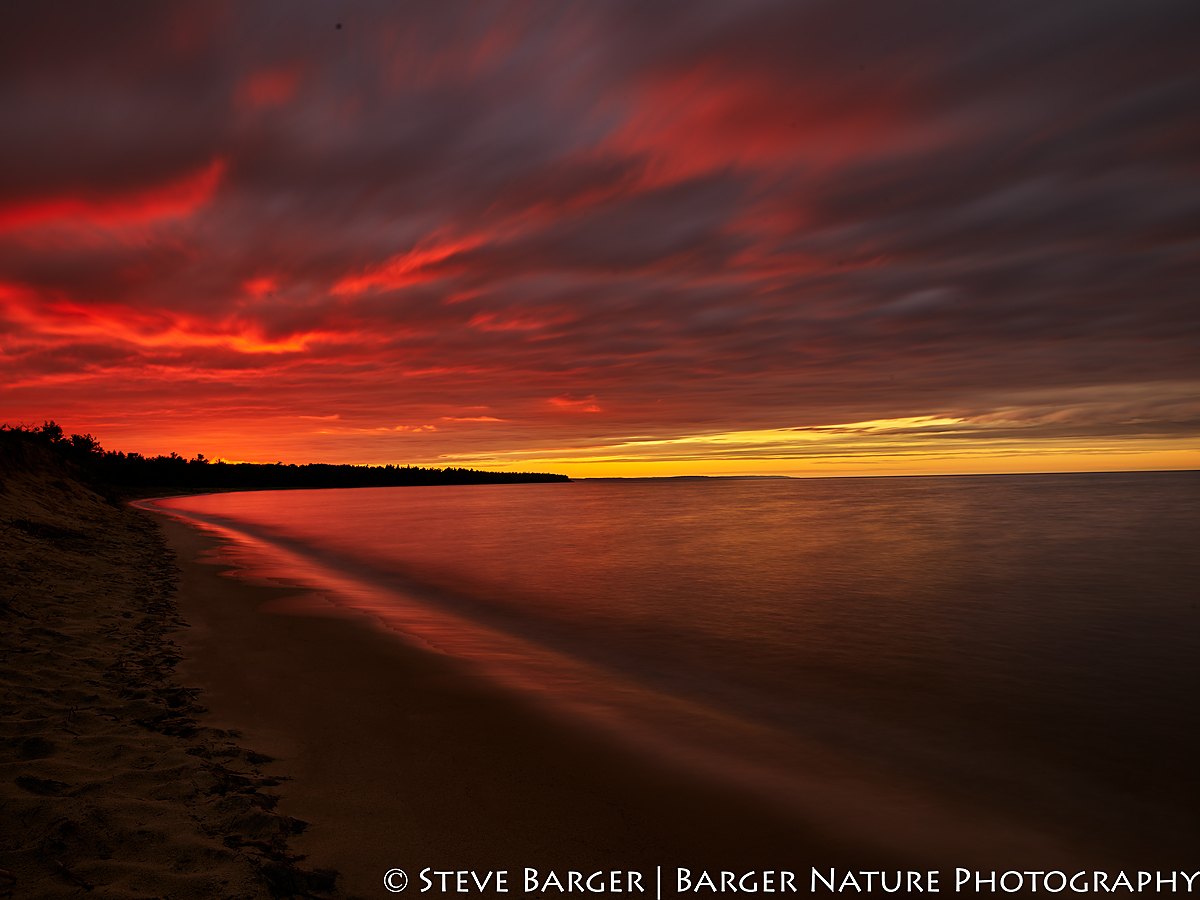
29.866s, Automated Frame Average – Michigan sunset along the shores of Lake Michigan using a medium format digital camera and wide angle lens and no filtration. The length of the Frame Averaged capture rendered the waters of Lake Michigan smooth and some movement in the clouds.
I just returned from a short trip to Sleeping Bear Dunes in northern Michigan near Traverse City. This was a short trip, only two days, so the time to photograph was severely limited. I arrived late Friday afternoon, so there was only time to checkout a sunset location. After a short half- mile uphill hike, I arrived at Pyramid Point. This location provided a nice panoramic view of the Lake Michigan shoreline, but the weather was uncooperative. The sun was hidden behind a thick cloud cover producing a cool blue light. While the muted pastels of the shoreline resulted in a nice image, the result was not what I was going for.
The weather forecast for the next day called for rain showers. In the morning, the rain was light and intermittent, allowing me to photograph during the frequent breaks in the rain. There were plenty of subjects to photograph under the soft, diffused, muted light. In the afternoon, I drove to an isolated beach to capture some late afternoon shots and possibly a sunset. My timing was perfect. As I pulled into the parking lot at the beach it started to storm. The weather radar indicated a substantial line of storms extending across Lake Michigan. With nothing better to do, I decided to sit in my car and wait for the weather to clear. I knew that it would be some time before the rain stopped, but thought it worth the wait. After two and a half hours, during which I had a short nap and answered some emails, the weather broke. You could see some blue sky appearing through the cloud cover. Also, the sky was clearing along the horizon. I decided to leave and have a quick dinner and return at sunset.
When I returned after dinner, the sky directly above the horizon was clearing nicely while there was still a cloud cover in the sky overhead, potentially great conditions for a dramatic sunset.
I quickly set up my camera and composed my image based on the direction of the setting sun. As the minutes passed, the color in the sky and the water became more vivid. The image posted here was captured at peak color.
I wanted to make the water on Lake Michigan appear smooth and calm which called for a long exposure. Based on my experience, I wanted to try a 30 second exposure. I felt a 30 second exposure would create the desired effect on the water. I selected an aperture of f/11 since this is the sweet spot for the lens that I was using and would provide me with sufficient depth of field. Using an aperture smaller than f/11 would result in a loss of sharpness due to diffraction. Using the base ISO of 50 would provide good dynamic range and superior image quality. The image needed to be properly exposed to avoid brightening the image in post-processing which would amplify image noise.
Given the ambient light level, the exposure at base ISO with the lens stopped down to f/11 would fall short of the 30 second exposure making it impossible to achieve the desired effect on the water that I wanted. There were two possible solutions to achieve a properly exposed image at a shutter speed of 30 seconds. Using a neutral density filter attached to the front of the lens would slow the shutter speed to 30 seconds. Attaching a five stop neutral density filter to the front of the lens would increase the exposure to 30 seconds, but would generate noise in the image. The the second method, frame averaging, would also produce the same effect as the neutral density filter without producing noise in the final image. Also, a frame averaged image would provide more detail in the shadow areas. It was obvious that employing the technique of frame averaging would result in a superior final image.
Frame averaging is not a new technique. Astrophotographers and others have been using this technique manually for years to reduce image noise when long exposures were needed. I have used frame averaging in the past to capture Milky Way images. The downside is that post processing these images can be very time consuming and tedious. Just recently cameras have been designed to automatically perform averaging in the camera eliminating the need for post processing steps.
Frame averaging works like this; first determine the shutter speed, ISO, and aperture needed for a properly exposed image. Next, determine the total exposure time needed to produce the desired effect. For this image, a 30 second exposure would create a smooth, glassy effect on the water by canceling the effect of the waves on the water. Knowing that the shutter speed to produce a properly exposed image would be 1 second, I would need to frame average 30 images for a 30 second exposure on the final image. The formula used for the frame averaged exposure time is:
frame averaged exposure time = (single image exposure time) x (number of images to be frame averaged)
Once all images in the frame averaged sequence have been captured, the camera processes the raw data from all images and produces a final raw image which is stored on its memory card. It is important to note that the camera does not process the individual images and then blend them to create the final image file. The camera takes the raw data from each image and uses a mathematical algorithm to combine all the raw data captured during the frame average exposure to generate one raw file which is output to the storage card. The resulting raw file has little to no noise present and significantly more detail in the shadow areas than a single image captured with a neutral density filter. In the image posted here, I was able to pull out subtle detail in the dark shoreline to add visual interest to the image.
I have titled this image “Vivid” since it showcases the vivid colors in the sunset reflected on the water and in the sky.


